Startup Repair tool is a free tool from Microsoft that looks for and fixes several common Windows problems, most of which are encountered during startup. However, depending on the problem, launching and using the tool can become difficult. We examined a variety of methods for accessing the tool. So, let’s go over them all one by one.
1. Run the Startup Repair Tool Using the Settings App
This is the simplest method for launching the Startup Repair tool on Windows. So we’ll start with that.
How to Use Windows 11 Settings App
Here’s how you could do it on Windows 11:
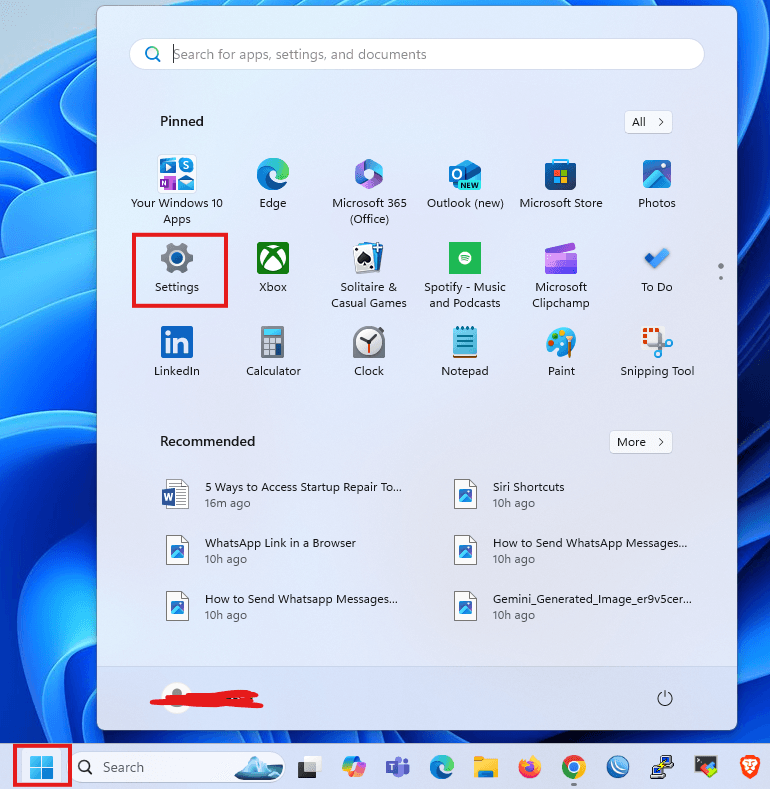
- Go to the Start menu search bar, type ‘settings,’ and select the best match. Alternately, use the Windows key + I shortcut.
- Now, click the System > Recovery button.
- Click Restart Now in the Advanced Startup section.

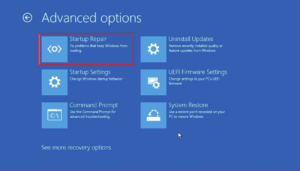
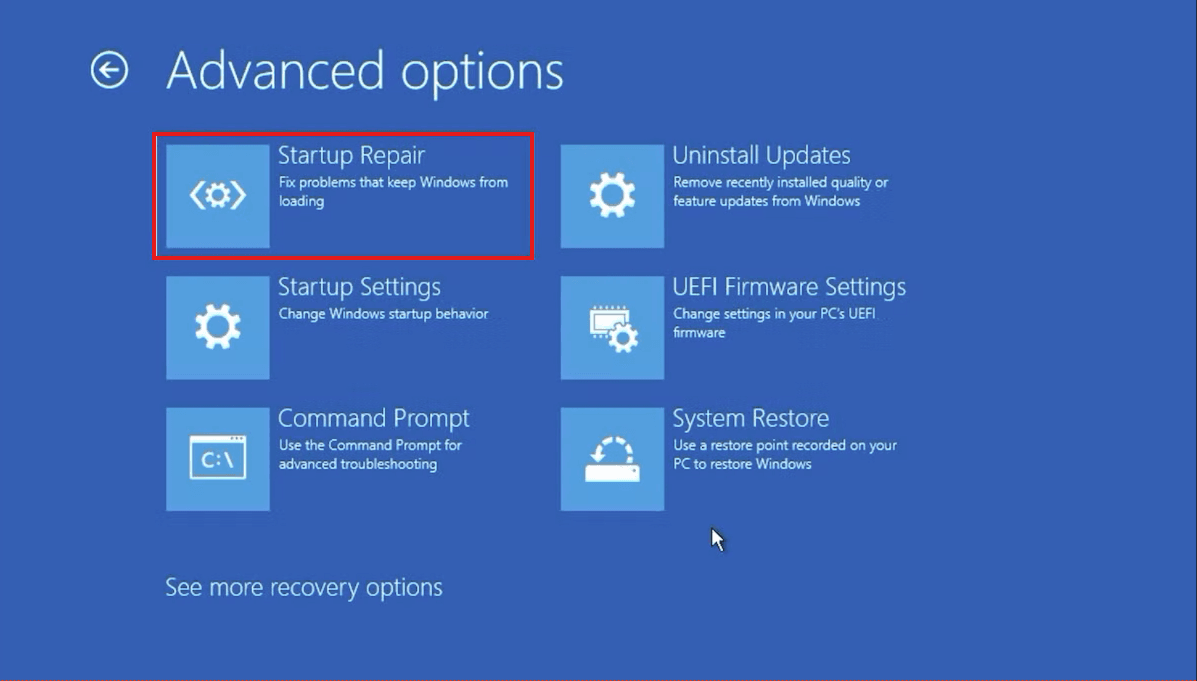
Your PC will boot into the Windows Recovery Environment the next time it boots up. From there, select Troubleshoot > Advanced Options > Startup Repair.
That’s it. The Startup Repair tool will be launched immediately after you choose the above-mentioned option.
How to Use the Settings App in Windows 10
While the basic structure of launching the Startup Repair tool in Windows 10 stays the same, the specific instructions displayed on the screen will alter significantly. So here’s how to use Startup Repair in Windows 10:
- To open the Settings menu, use the Windows key + I shortcut.
- Choose Update & Security > Recovery from the menu.
- Click Restart now from the Advanced Startup menu.
When you do this, Windows will boot into the Windows Recovery Environment (Win RE). The next steps are similar to those you took for Windows 11.
2. Start the Startup Repair Tool from the desktop
The process that was explained above will actually work for all users. And if it doesn’t, use this option, typically when you can’t access or use the Settings app. Here’s how it’s done:

- Select the Power button by clicking the Start menu icon.
- Hold down the Shift key and then click Restart.
That’s it; your PC will restart from here, and you’ll be taken to the Win RE menu. Then, repeat the procedures from Method 1 and select Advanced Options > Startup Repair.
The Startup Repair tool will be started from here.
3. Perform the Startup Repair from BIOS
If you have an installation media, using the Startup Repair tool will be an easy task. Simply insert the USB stick containing the installation media and restart your PC.
Create a Windows USB installation stick before you begin if you don’t already have one. After you have the USB stick ready, follow the below steps:
- Assign your USB stick as the first booting option in the BIOS/UEFI settings.
- Once the installation USB stick is plugged in, boot the PC from it.
- The Windows Setup allows you to select the edition of Windows, the language, etc.
- You can now start Startup Repair by clicking on the USB stick.
Here you will find the opportunity to run the Startup Repair tool, which will scan your Windows computer and try to fix any problems it finds.
4. Use the Command Prompt
The Command Prompt is a free Windows utility that allows you to modify your Windows settings and other items in a way that makes using Windows easier.
Here’s how to use the Command Prompt to launch Startup Repair on your PC:
- Go to the Start menu search bar, type ‘cmd,’ and launch Command Prompt as an administrator.
- Enter the following command into cmd: shutdown /r /o
When you press Enter, your computer will restart in the Advanced Startup Options menu, from which you can select the Startup Repair option.

5. During boot, press the F11 shortcut key
Sometimes, simply pressing the F11 key repeatedly during boot-up will send you to the Advanced Options menu. So, give it a shot as well. You may quickly access the Windows Startup Options tool from there.
There are numerous ways to launch the Startup Repair tool on Windows, like with practically everything else. So, if one way of opening the tool fails, you have the others to try as well.
ALSO READ
Conclusion
The Startup Repair tool is an essential utility for resolving startup issues on Windows. From using the Settings app to accessing it through Command Prompt or BIOS, this guide provides multiple methods to ensure you can troubleshoot effectively. If one approach doesn’t work, you can always try another, making it a flexible and reliable solution for Windows users.